Workspaces & Team Management
A workspace is your team’s shared environment inside VidRush. It’s where your videos, credits, and team members live. Every VidRush account belongs to at least one workspace, and if you’re on a team plan, you can invite others to collaborate in yours.
How workspaces work
Each workspace operates independently, with its own credit balance, video library, and team roster. Your plan tier determines how many seats are available in your workspace. Every seat is a slot for one team member.
Credits are shared across the workspace. When any member generates a video, it draws from the same pool. There’s no per-user credit allocation, the workspace owner manages the overall budget through their plan.
Roles and permissions
Workspaces use role-based access to keep things organized:
Owner: Full control. Manages billing, seats, and workspace settings. Can invite and remove members. One owner per workspace.
Member: Can create and edit videos using the workspace’s shared credits. Cannot invite others or change workspace settings.
When inviting someone, you’ll assign their role during the process. Roles can be updated later from the Settings menu.
Seat limits by plan
| Plan | Team Seats Included |
|---|---|
| Starter | 0 (solo only) |
| Creator | 1 |
| Pro | 3 |
| Scale | 10 |
| Studio | 15 |
Adding a team member
To invite someone to your workspace:
- Go to Settings in the sidebar.
- Navigate to the Team or Members section .
- Enter their email address.
- They’ll receive an email invitation with a link to join.
If the person you’re inviting doesn’t have a VidRush account yet, they’ll need to be approved first. To fast-track this, open a support ticket through the Crisp chat widget (bottom-right corner at app.vidrush.ai ) and ask the team to manually approve their account. Once active, your invitation will work immediately.
→ Each seat is tied to your plan tier. If you’ve filled all available seats, you’ll need to upgrade your plan before adding more members.
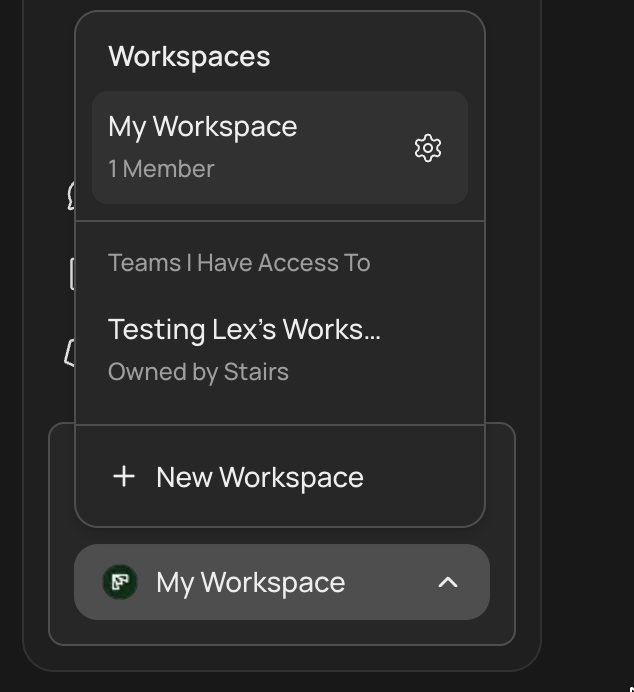
Switching between workspaces
If you belong to more than one workspace, for example, your own personal workspace and a team workspace, you can switch between them without logging out.
Look for the workspace switcher in the top-right corner of the dashboard. Click it to see all workspaces tied to your account, then select the one you want to work in. Your video library, credits, and team roster will update to reflect the active workspace.
Each workspace is completely separate. Videos created in one workspace don’t appear in another, and credits don’t transfer between them. But you can swap videos between them.
Team members cannot see each other’s personal workspaces. If you’re creating a shared project, make sure you’re generating it in the correct workspace before hitting generate.
Common scenarios
“I hit my seat limit.” Upgrade your plan to unlock more seats, or remove an inactive member to free up a slot. See Updating Your Plan.
“My teammate can’t accept the invite.” They likely don’t have a VidRush account yet and are not in waitlist. Open a Crisp ticket to get them manually approved, then resend the invite.
“I want to move a video to another workspace.” Workspaces Videos can now be moved throughout workspaces.