Quick Start Guide
A new video tutorial for VidRush V2 is being recorded. Until it goes live, this written guide covers the entire flow. The previous tutorial video shows the old interface and has moved to the old tutorial video .
VidRush turns your topic or script into a fully edited, YouTube-ready video. You provide the idea; VidRush handles the script, narration, visuals, and editing. This page gets your first video out without wasting credits.
The 7 steps at a glance
- Set up your Brand Profile (once)
- Pick a model and reasoning effort (Low, Medium, or Experimental)
- Write your prompt, with the title, format, and length right in the text
- Pick a thumbnail, skip the step, or paste a custom reference URL
- Review the Quote Statement, check the credit estimate, approve
- Wait roughly 50 to 60 minutes while VidRush generates
- Fine-tune in the editor, render, publish
Step 1: Set up your Brand Profile (do this once or per Channel)
Your Brand Profile holds everything that stays the same across your channel: video language, voiceover provider and default voice, backgrounds, theme, and compliance rules such as blacklisted footage sources.
Click your Brand Profile selector, choose New Brand Profile, give it a name, set your video language, and pick your voiceover. Configure Creative Assets and Compliance if you want; the defaults are fine to start.
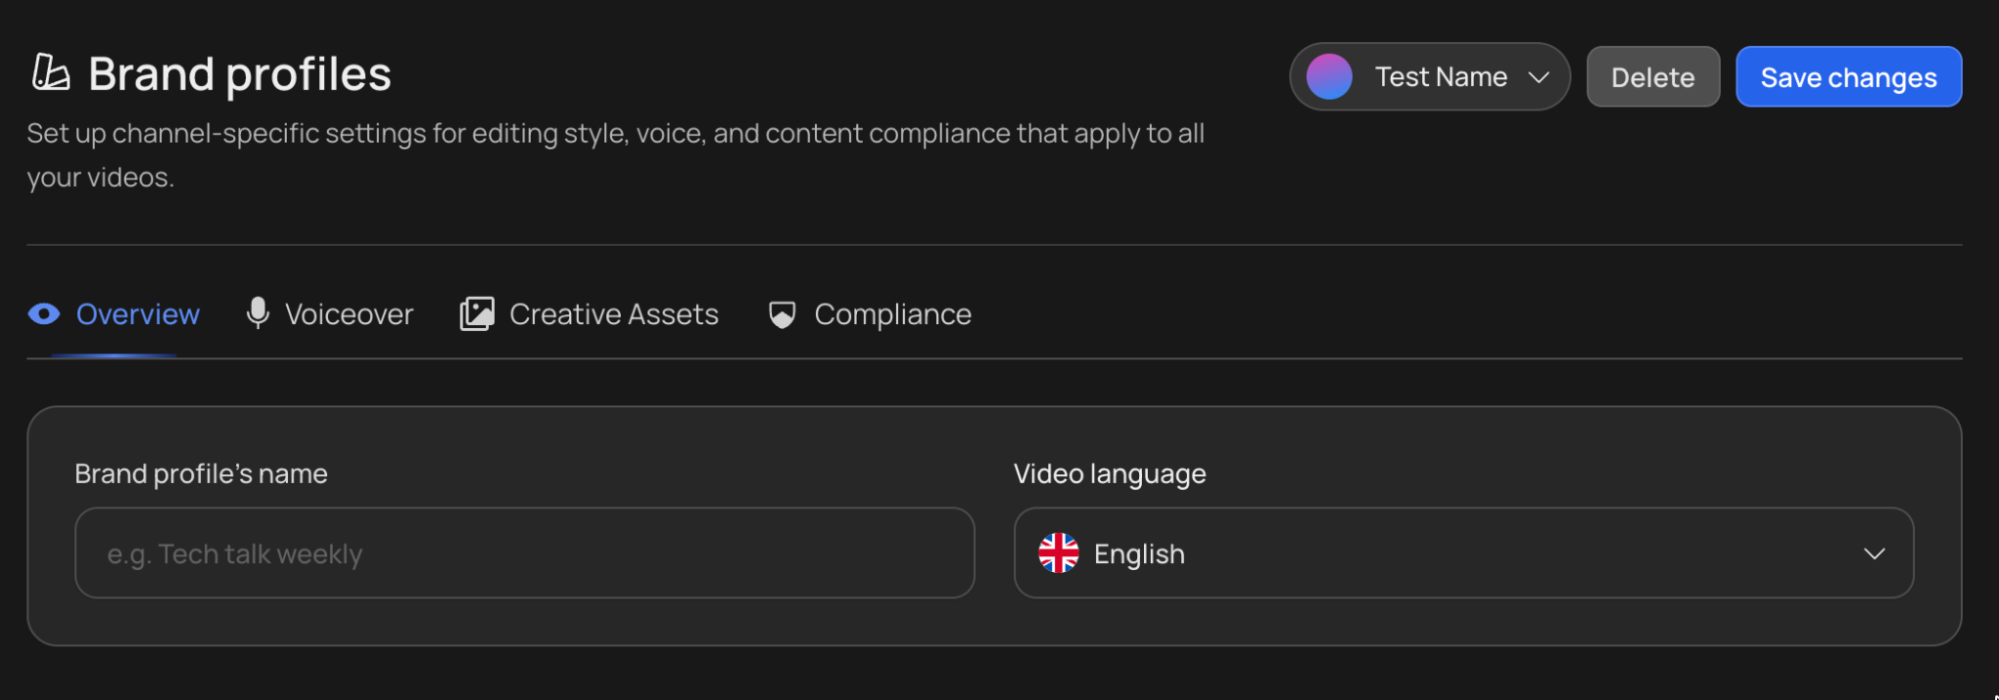
Every video you generate uses the active Brand Profile, so you never re-select a voice, theme, or language again. Full guide: Brand Profile.
Step 2: Pick a model and reasoning effort
- Deep Video v1 Mini (images plus motion graphics): cheapest, good for testing topics.
- Deep Video v1 Pro (video B-roll plus images): the full visual experience.
- Reasoning effort: Low, Medium, or Experimental. Medium is the recommendation for most videos. Experimental runs the newest pipeline and belongs on test videos first.
Both selectors sit on the dashboard next to the prompt field. Start cheap, validate the topic, then scale up. See Generation Models.
Step 3: Write your prompt
Everything goes in the prompt now. The format, duration, and mode menus from earlier versions were removed.
Make me a 20-minute documentary about how the small town of
Kojima became the world's denim capital.

Main talking points:
1. ...
2. ...
What you can put in your prompt:
- The Format. “Make me a documentary” or “make me a top 10 video”. VidRush recognizes it and sets the format.
- The length. “Make me a 30-minute video.”
- Research instructions and links: what to research, which angles.
To skip AI writing entirely, click + and attach a Custom Script or upload a Custom Voiceover. VidRush infers the format and length from your script or audio automatically.
The AI Prompt Checker reviews your prompt, and your custom script if you attached one, before generation. The check takes a moment to run. If no error appears, you can continue.
Full prompting strategy: Prompting and In-Depth Prompting.
Step 4: Pick a thumbnail
VidRush offers thumbnail options for your video. Pick one you like, skip the step entirely, or paste a custom thumbnail URL to use a specific reference. The generator designs around your video title, so give it the title you would actually publish with. See Thumbnail Generator.
Step 5: Review the Quote Statement
VidRush now shows the Quote Statement, its understanding of your request. Check the format, duration, language, model, Brand Profile, and voice. You can override any of them right there, including the video title. Fixing the title is worth a few seconds, because the thumbnail is generated around it.
When everything looks right, hit Approve & Continue. A final screen shows the estimated total credits for the generation; the real cost can end up slightly higher or lower. Approve once more and generation starts. Full guide: The Quote Statement.
Step 6: Wait (you can close the tab)
Your video enters the queue. During high-traffic periods it can take a little while before the progress bar appears. Generation runs in the cloud and typically takes 50 to 60 minutes. The finished video lands in Projects.
Step 7: Edit, render, publish
Open the video in the editor: swap clips, fix text, adjust audio, then hit Render Video. Re-renders cost about 10% of the original generation. Download the file and upload it to YouTube.
One YouTube setting you must not skip: VidRush uses AI narration and some AI images, so toggle on YouTube’s “Altered or synthetic content” disclosure when uploading. Declaring it protects your channel against demonetization.