Voice Studio
Voice Studio is where you make voices and voiceovers. Open it from Voice Studio in the left sidebar. It has two tabs:
- My voices: design a new voice from a description, or clone your own voice or your presenter’s.
- Custom Voiceover: turn a script into a finished voiceover file, using a library voice or one of your own.
Voices you make belong to your workspace. You can use them in any video, as a brand profile’s default voice, or on an AI avatar.
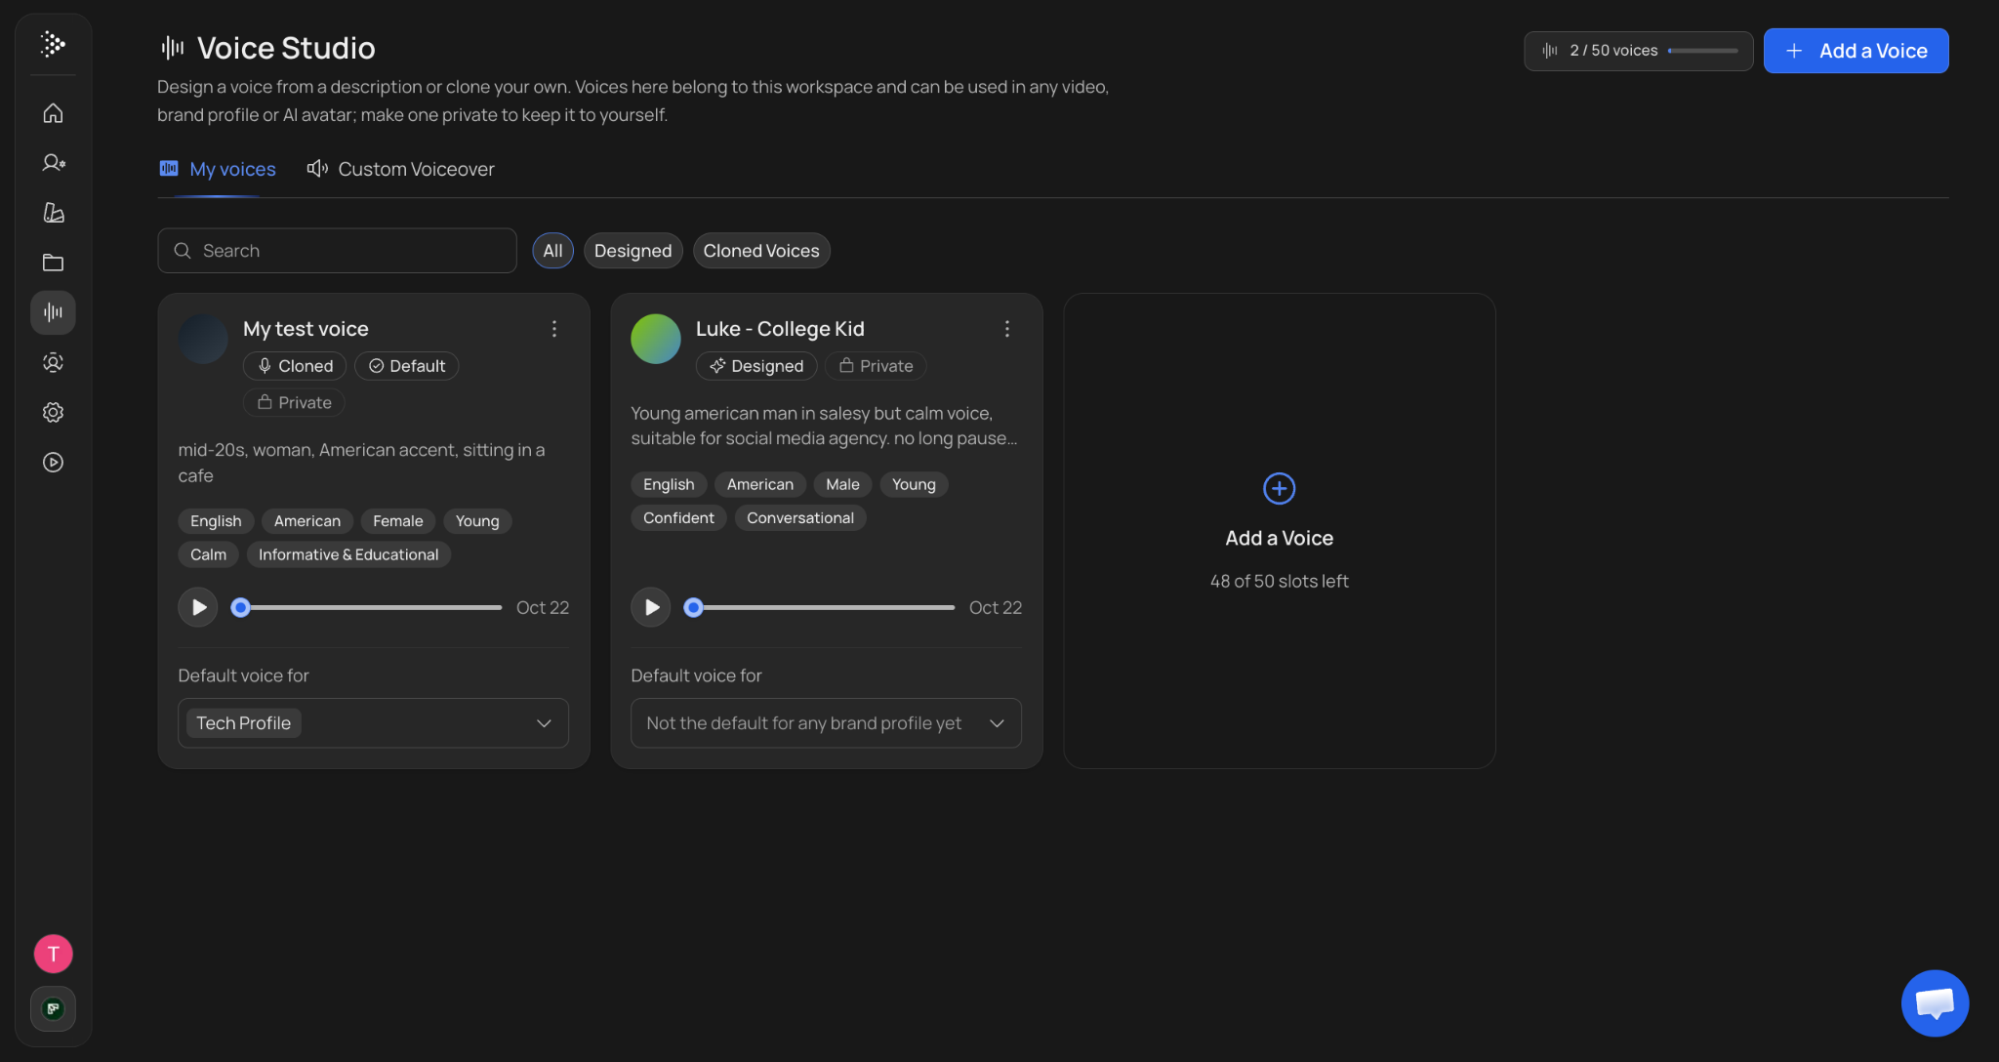
My voices
This tab lists every voice you have made. Search by name, or filter by All, Designed or Cloned Voices. The counter at the top right shows how many of your voice slots are used.
Each voice card shows:
- Its name and badges: Designed or Cloned, Private or Shared, and Default if it’s the voice of your default brand profile.
- The description you gave it.
- Tags for language, accent, gender, age, tone and use case.
- A play button to hear a sample.
- Default voice for: pick the brand profile that should use this voice by default. Every video made with that brand profile then uses it automatically.
Open the menu on a card to use the voice in Custom Voiceover, edit its name, description, tags or sharing, or delete it. New voices are private to you until you share them with your workspace. To add one, click Add a Voice and choose how to create it.
Voice Design (recommended)
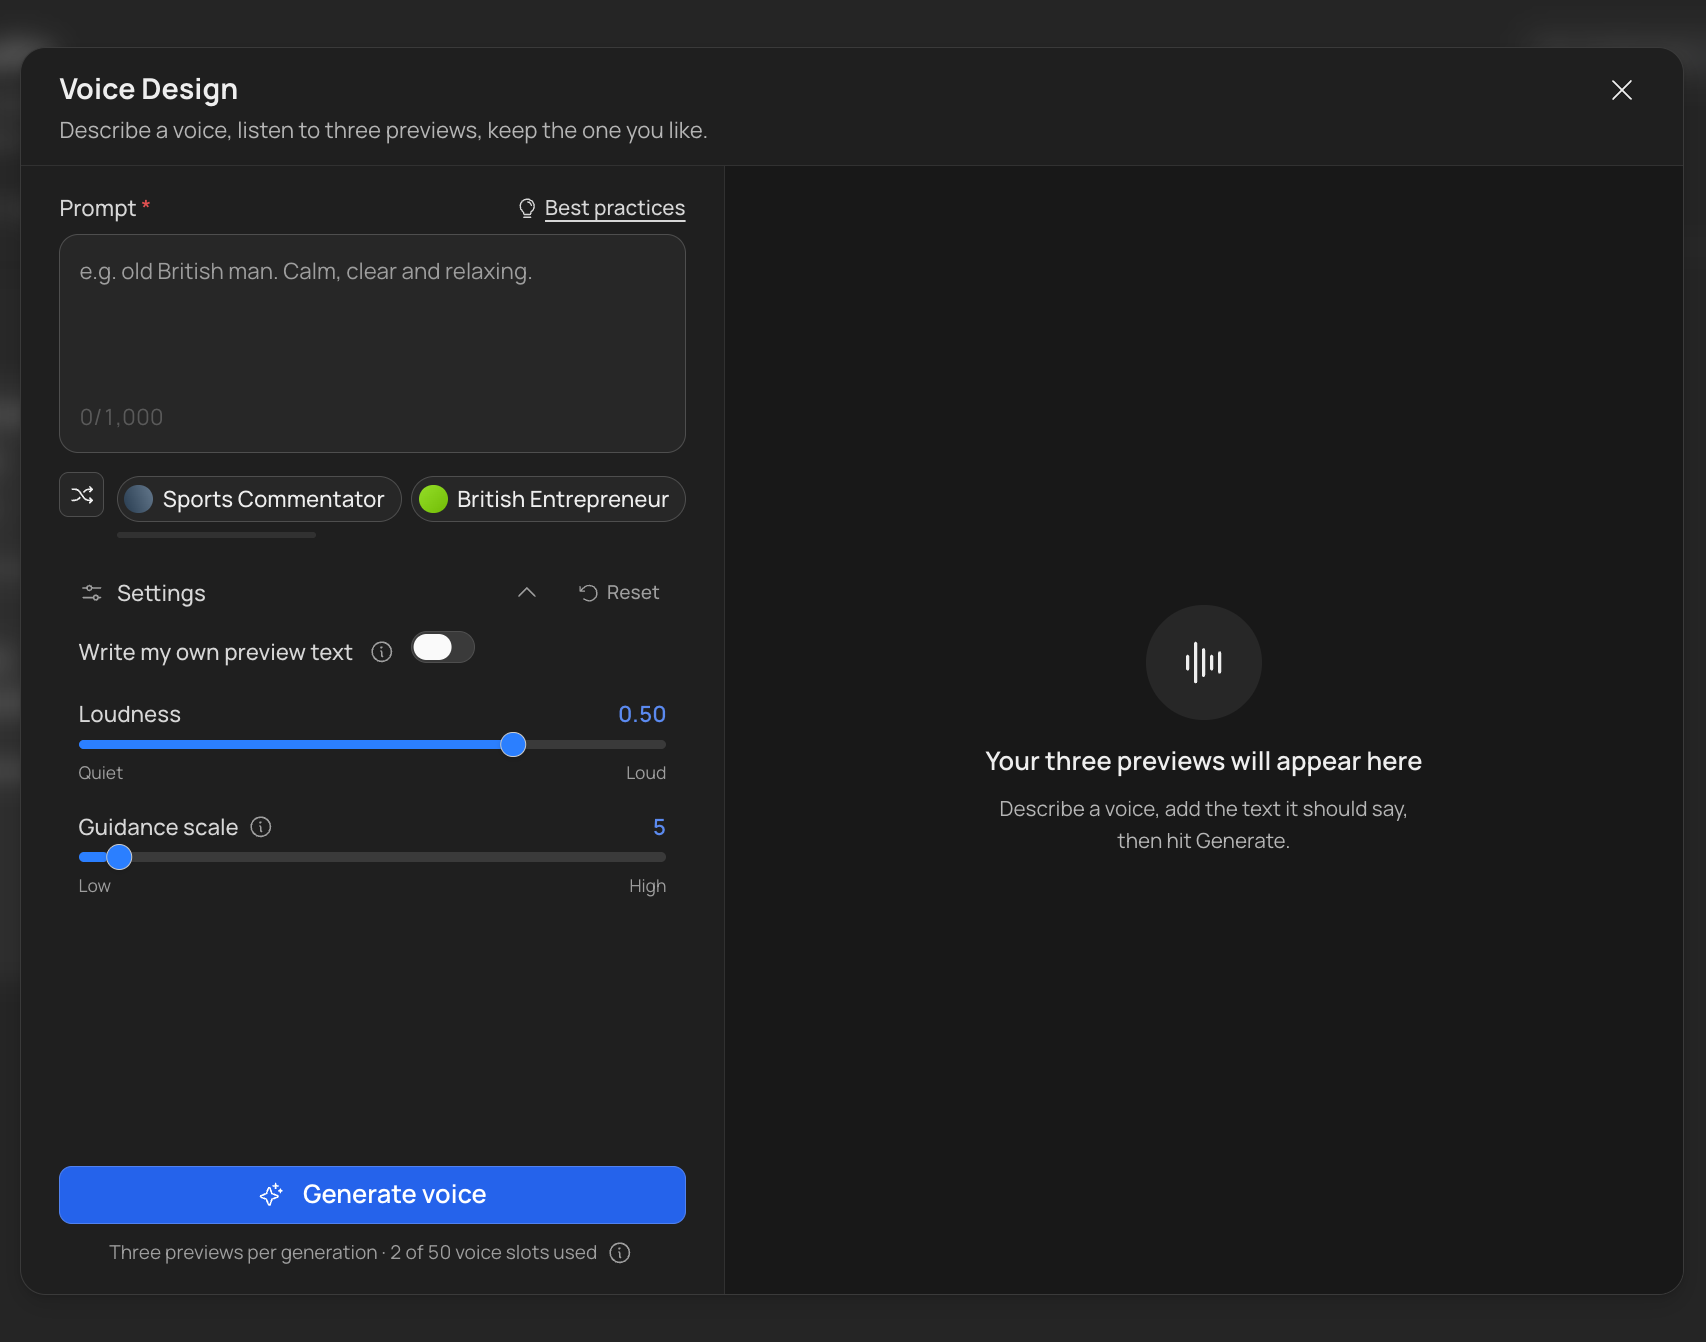
Describe the voice you want in plain English and get three previews in about 10 seconds. Keep the one you like.
- Write a prompt describing the voice: age, accent, tone and delivery. For example, “Old British man. Calm, clear and relaxing.” Prompts need 20 to 1,000 characters.
- Not sure where to start? Click a starter such as Sports Commentator, British Entrepreneur or Movie Trailer Voice, or use the shuffle button for more ideas.
- Adjust the settings if you want (see below).
- Click Generate voice and listen to the three previews.
- Pick the best one, give it a name and click Create Voice.
Previews are free. If none of them fit, change the description or settings and generate again.
| Setting | What it does |
|---|---|
| Write my own preview text | Lets you type the sentence the previews will read, instead of a generated one. |
| Loudness | From Quiet to Loud. Starts at 0.50. |
| Guidance scale | From Low to High. Higher values stick more closely to your description. Starts at 5. |
| Reset | Puts every setting back to its default. |
Open Best practices above the prompt box for tips on writing a good description.
Instant Voice Clone
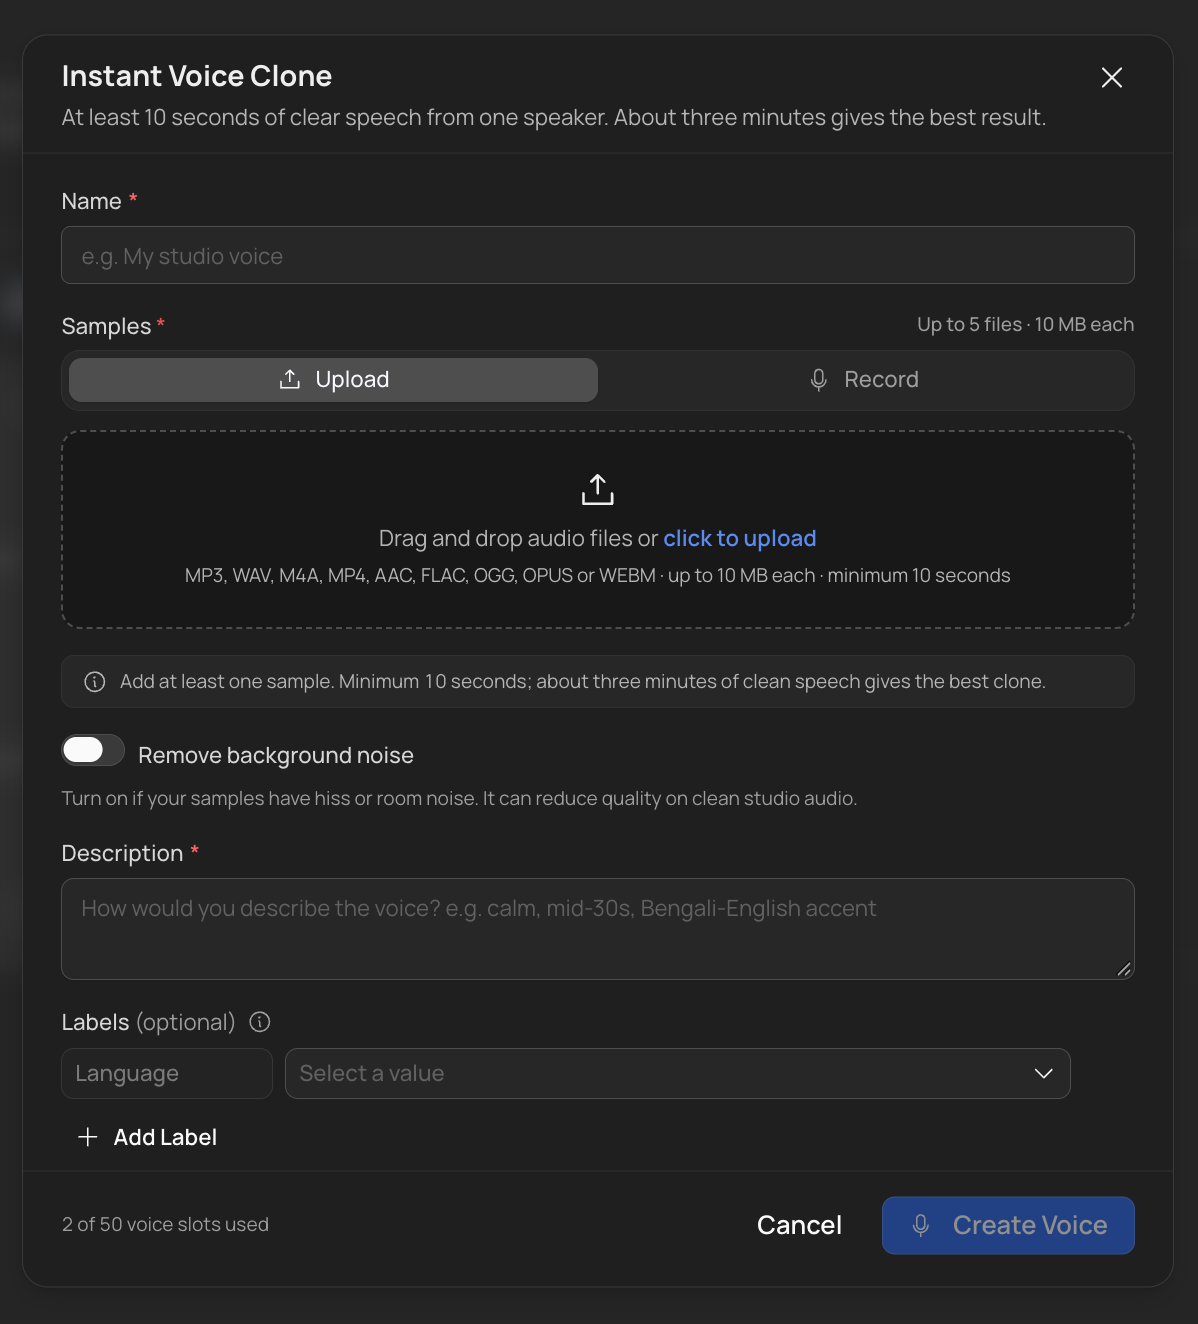
Upload or record clear speech from one speaker and get a voice that sounds like you or your presenter.
- Give the voice a name.
- Add samples: upload files or record in your browser. You need at least 10 seconds. About three minutes of clean speech gives the best result.
- Turn on Remove background noise if your samples have hiss or room noise. Leave it off for clean studio audio, as it can lower quality there.
- Describe the voice, for example “calm, mid-30s, Bengali-English accent”.
- Tick the box to confirm you have the rights or consent to clone these samples.
- Click Create Voice.
If your browser blocks the microphone, Voice Studio shows step-by-step instructions to unblock it. When you label a voice, you can pick an ElevenLabs accent that matches its language.
| Sample requirement | Limit |
|---|---|
| File types | MP3, WAV, M4A, MP4, AAC, FLAC, OGG, OPUS, WEBM |
| Number of files | Up to 5 |
| File size | Up to 10 MB each |
| Length | At least 10 seconds in total, with at least 3 spoken words in the first 30 seconds of each sample. About 3 minutes is best. |
Tips for a good clone:
- Record one speaker only, in a quiet room, with no music behind you.
- Speak the way you want the narration to sound. A calm reading gives a calm clone.
Custom Voiceover
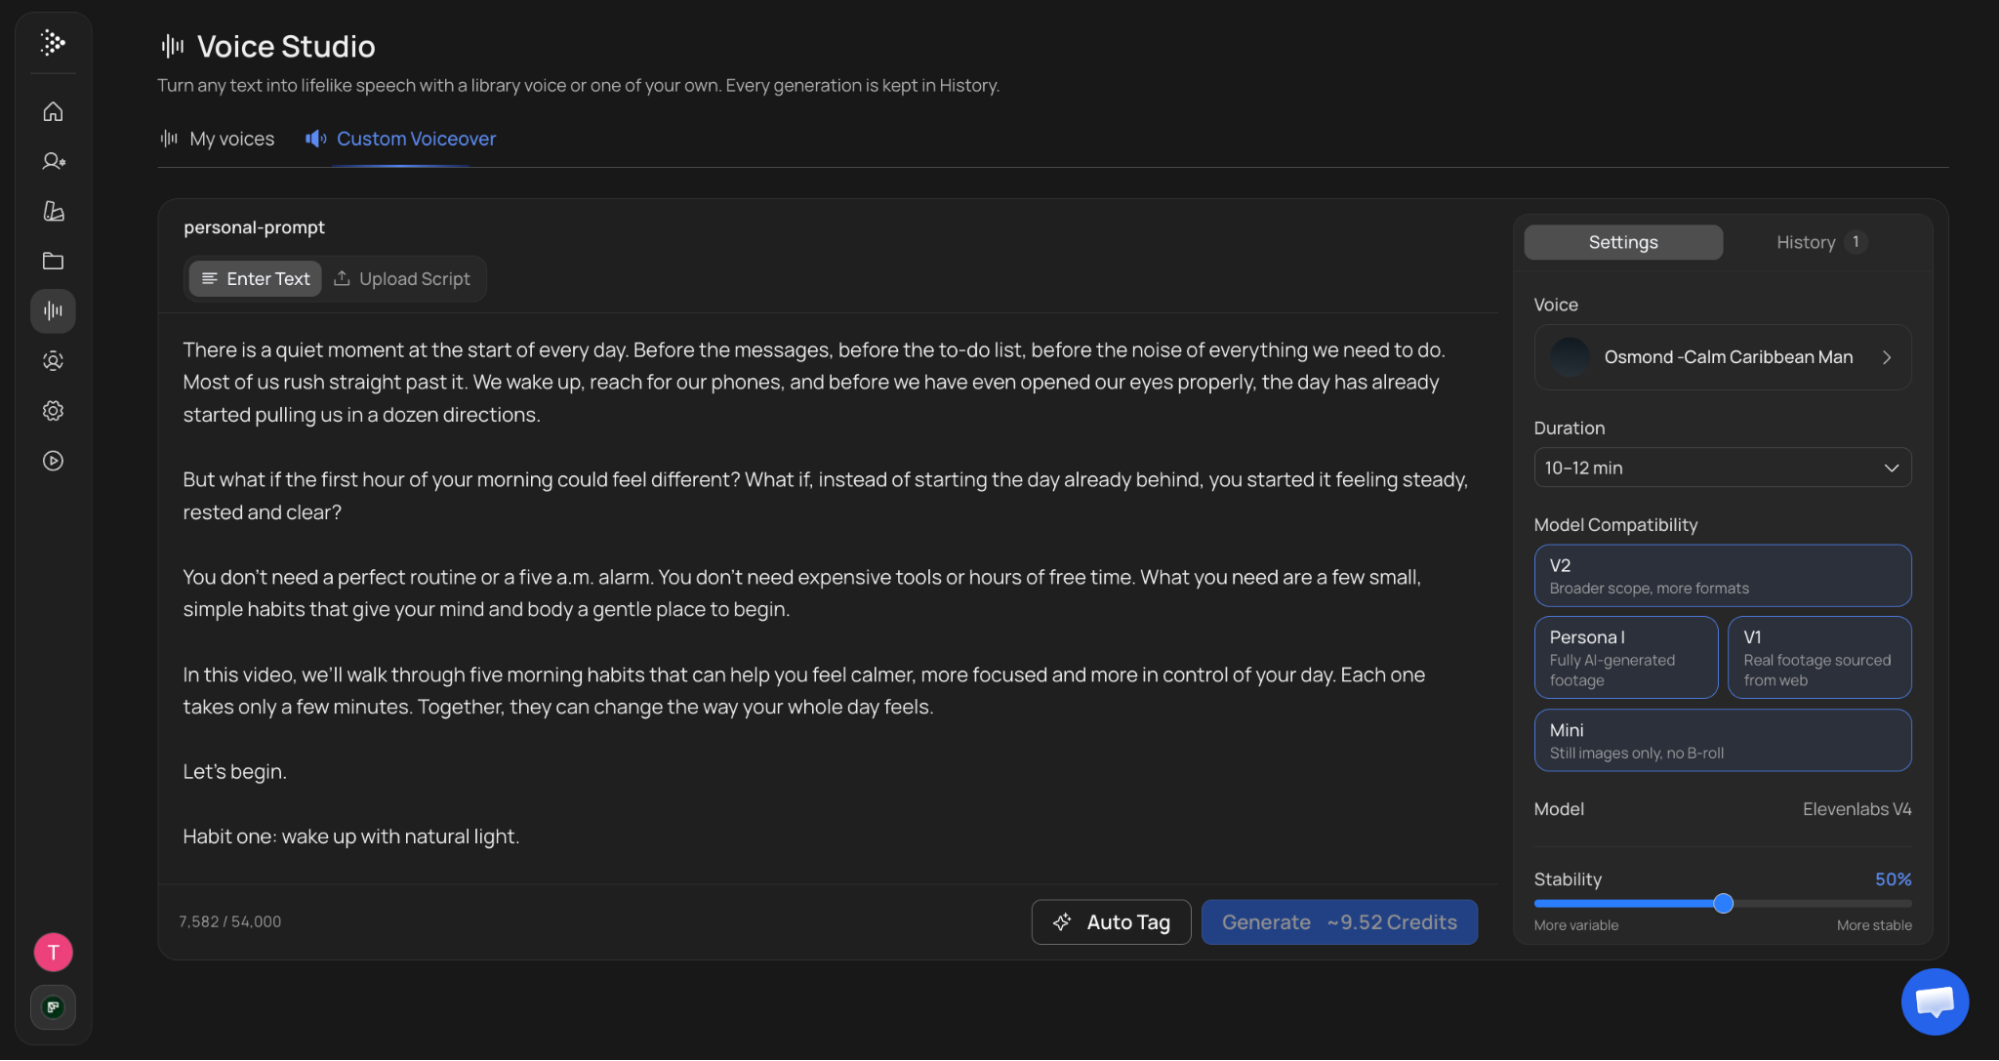
Paste or upload a script, pick a voice, and generate the voiceover as its own audio file. Use it in a video straight away, or download it. To use narration you recorded yourself, upload it in the composer instead. See Custom Voiceover.
- Name the voiceover.
- Choose Enter Text to type or paste your script, or Upload Script to add a file. Scripts need 5,400 to 54,000 characters, about 6 to 60 minutes of speech. Tags added by Auto Tag don’t count toward the limit, up to 63,000 characters in total. Uploaded scripts can be .txt or .md files, up to 1 MB. Need a script first? Click Generate Script with AI to have Script Writer write it.
- In Settings, pick a Voice: an ElevenLabs voice from the library, or one of your own. Cartesia voices and Community voices can’t be used for Custom Voiceover.
- Under Model Compatibility, tick the video models you plan to use: V2, Persona I, V1 or Mini. All four are ticked at first. Your text must fit every model you tick, so untick the ones you won’t use. For example, V2 needs 10 to 30 minutes, so untick it for a shorter voiceover.
- Duration follows the length of your text. You can also pick a length band yourself.
- Optional: click Auto Tag (see below).
- Click Generate. The button shows how many credits the voiceover will cost.
Under the text you see how many characters will be spoken, out of 54,000. If your text is too short or too long for a model you ticked, Generate is greyed out. Hover over it to see why, for example “Too short for V2 (10–30 min). Add more text.”
Auto Tag adds delivery cues to each line of your script, so the narration carries emotion and emphasis instead of reading flat.
| Setting | What it does |
|---|---|
| Voice | The voice that reads the script. Your own voices are under My Voices, separate from Favorites. |
| Duration | The video length band you are aiming for. |
| Model Compatibility | The video models you will use. The length check covers every model you tick. |
| Model | The speech engine (ElevenLabs V4). |
| Stability | From More variable to More stable. Starts at 50%. |
| Similarity | How closely the output sticks to the original voice, from Low to High. Starts at 75%. |
| Language Override | Fixes the voiceover to one language, in case the system mistakes it for another. |
| Reset Values | Puts every setting back to its default. |
Every generation is kept in the History tab next to Settings. Each voiceover is saved as an MP3 in your Media Library, in the Custom Voiceover folder. From there you can download it, or attach it in the composer with Add Voiceover → Voiceover Generations. See Generate with AI.
What it costs
| Action | Cost |
|---|---|
| Voice Design previews | Free |
| Saving a designed or cloned voice | Free |
| Custom Voiceover | 1.256 credits per 1,000 characters |
The Generate button shows an estimate before you generate. Tags added by Auto Tag aren’t counted, Auto Tag itself is free, and a failed run isn’t charged.
How many voices you can keep depends on your plan. Deleting a voice frees its slot.
| Plan | Voices |
|---|---|
| Starter | 5 |
| Creator | 10 |
| Pro | 20 |
| Scale | 30 |
| Studio | 50 |
You can run as many voice designs, clones and voiceovers at once as your plan’s concurrent generation limit. They have their own pool, so they don’t use up your video slots. If you already have as many running as your plan allows, a new one is refused rather than queued, and costs nothing.
Good to know
- Created voices work in English, German and Spanish.
- Only clone a voice you have the right to use. You confirm this when you create the clone, and a clone can be refused if the voice provider holds it for verification.
- You can delete a voice that brand profiles use; those profiles switch to the default voice. A voice used by an AI avatar, or by a video that’s still generating, can’t be deleted.
- YouTube’s AI disclosure still applies: a cloned voice is still AI-generated narration. See Voice Selection.